The Ultimate Guide To Tile Installation San Antonio
Wiki Article
How Tile Installation San Antonio can Save You Time, Stress, and Money.
Table of ContentsGetting My Tile Installation San Antonio To WorkSome Ideas on Tile Installation San Antonio You Need To KnowThe 7-Second Trick For Tile Installation San AntonioGetting My Tile Installation San Antonio To WorkThe Best Strategy To Use For Tile Installation San AntonioWhat Does Tile Installation San Antonio Mean?
When you've finished laying tile, allow the thinset dry for 24-hour before grouting.Prepare your area for grouting by wiping any type of excess thinset eject as well as in grout joints. An utility knife functions the best to clear out the cement joints. See to it to switch out your water container routinely, work with clean water and also make use of a nearly completely dry sponge. tile installation san antonio. Eliminate your spacers.
Start applying your cement with a cement float. Hold it at a 45 angle while likewise coming at your grout line diagonally.
Some Ideas on Tile Installation San Antonio You Should Know
We like to recommend rotating grouting and also cleansing and switching back as well as forth every 1030 minutes depending on the type of cement, temperature and various other elements. Be cautious not to utilize as well much water when cleaning up as it can seep the pigment out of the grout as well as lighten the shade.It is easier to use cement only to the joints of a large-format tile whereas a tiny mosaic will require to be nearly fully covered to complete every one of the joints. When you are finished grouting, it is most likely that a cement haze will develop on the surface of the tiles.
Let the grout set up for a few hrs, and afterwards use a suggested grout haze eliminator and a dry or practically dry sponge or dustcloth. Come at the grout line at a diagonal to avoid removing grout from the joint. Next, you'll intend to strike your grout line. This means making use of a sponge that is practically dry to pull throughout the grout, smoothing it.
Tile Installation San Antonio for Dummies
Cement fills the spaces in between the ceramic tiles. Like paint, grout can come in a selection of shade alternatives that match or match your ceramic tile.Mix grout according to package instructions. After the cement prepares, spread it in sweeping arcs with the rubber cement float held at a superficial angle. Apply at a 45-degree angle to the rooms in between ceramic tiles to avoid the float from pressing into the spaces and creating irregular cement surface areas.
Things about Tile Installation San Antonio
For joints 1/8-inch to 1/2-inch, make use of sanded cement. Follow the floor tile producer's referrals. If there are voids in between the ceramic tile as well as the wall surface, be certain to fill the room with caulk to maintain water from obtaining under the tile or into the wall surface.It likewise will not fracture and also can be changed quickly. While you can likewise load the spaces browse around this web-site with mortar or cement, it is not as versatile, waterproof or very easy to repair as caulk.
3 out of 5Moderate, Laying floor tile can be hard on the knees and back $4 to $8 ordinary cost per square foot, Joe Ferrante has been laying tile for 30 yearsmany of them for This Old Houseand besides this moment, he's still rapt with the product - tile installation san antonio. "I enjoy tile," he states.
See This Report on Tile Installation San Antonio
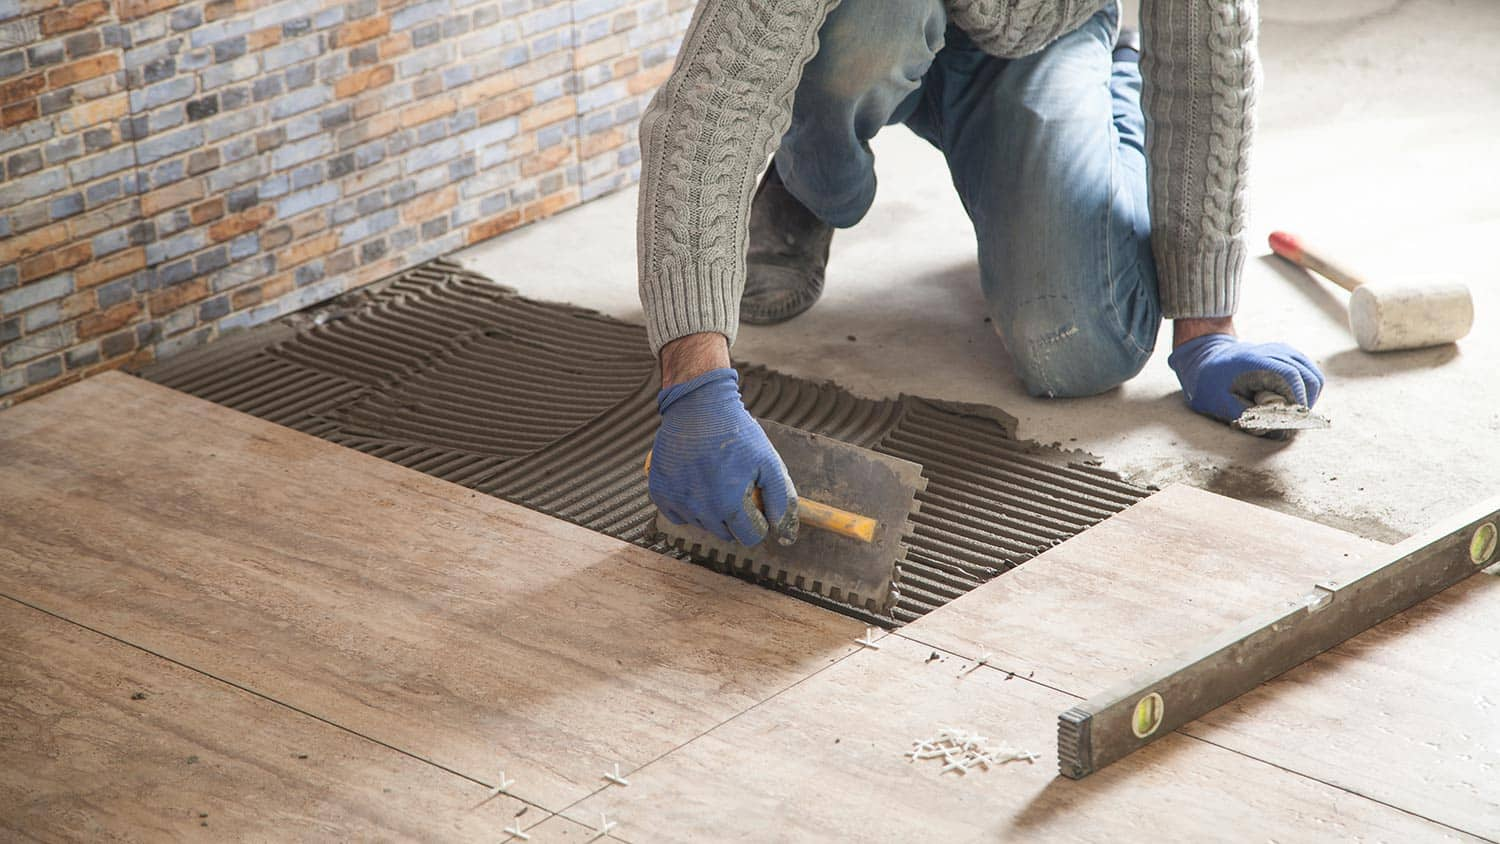
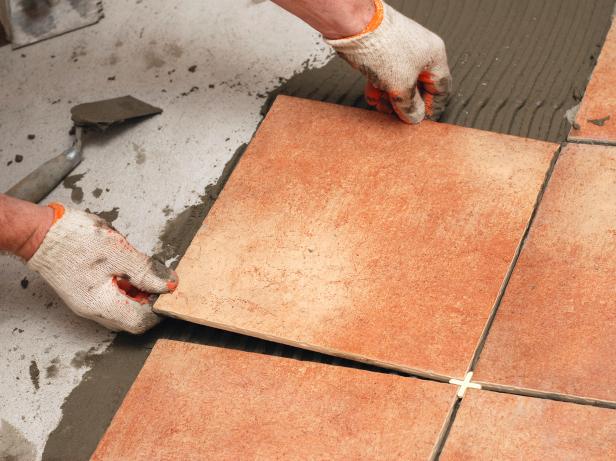
Illustration by Gregory Nemec Pursue a layout that optimizes the linked here variety of entire tiles and the size of any kind of cut floor tiles. When awkwardly sized ceramic tiles can not be stayed clear of, place them where vanities will cover them later on or out of the primary view lines from the doorway. You should not tip on any kind of ceramic tiles till the thinset has actually cured for at least 1 day.After that lease the wetsaw for eventually. Picture by David Carmack Locate the navel of each wall as well as break chalk lines on the floor. The line going across at the room's center are the beginning point of the tile. Lay a row of tiles along a straightedge more than midway throughout the room.
Top Guidelines Of Tile Installation San Antonio
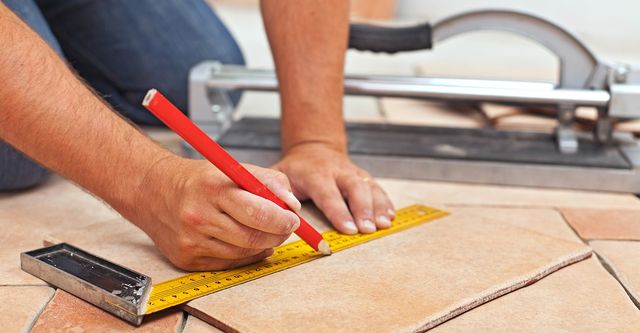
After readjusting the A-to-B line, note the facility ceramic tile where it touches the chalk line in between the various other wall surfaces (call them C and also D). Straighten these marks with the C-to-D chalk line. Repeat the measuring as well as adjusting process for wall surfaces C as well as D. Lay a straightedge alongside the C-to-D line and also against one side of the facility floor tile.
Mix only as much thinset as you can use in 2 hrs. With the level side of a trowel, spread a slim layer of thinset (scrape layer) over a 2-by-3-foot location beside the straightedge. Prior to the scrape layer dries, use more thinset using the notched edge of the trowel.
Report this wiki page